What is Playwright?
Playwright is a Headless Browser Testing framework designed by Microsoft. This is an open-source NodeJS based framework. Playwright was released for public by Microsoft on 31st January 2020. Although this is quite new to the IT industry, Playwright has gained the attention of the majority of IT professionals due to the smartness of the framework and because of the fact that Playwright is built by the original creators of Puppeteer, which happens to be the go-to tool for automation when speed and performance of automated tests are the target of an automation project.
Pros Playwright
- It is open-source and free.
- Setup and configuration is easy.
- Provides wider range of coverage for cross browser testing, hence supports, Chrome, Firefox and WebKit.
- Supports Windows, Linux as well as macOS.
- Supports multiple languages as JavaScript, Java, Python, .NET and C#.
- Supports test runner frameworks like Mocha, Jest and Jesmine.
- Presents headless browser testing with event-driven architecture.
- Can be integrated with major CI/CD tools like Jenkins, CircleCI, Azure Pipeline and TravisCI.
- Highly useful for performing cross browser testing for complex applications due to its accuracy, wide coverage and high speed.
- Playwright ensures auto wait. Therefore testers don’t have to write code for the wait explicitly because Playwright readies the UI in the backend before test interacts with web elements as soon as the test script is run.
- Playwright auto wait feature ensures that the requested action is only performed when relevant checks of the element are completed, therefore accuracy of test results tend to be high.
- Supports parallel testing through browser context, thus helps in scenarios where multiple browser tabs have to be opened simultaneously.
- Test generation in Playwright lets user perform actions in the browser and it will auto generate the code for the user interactions inside the inspector, thus saving time which takes to write the test code.
- Has built in reporters like List, Dot, Line, JSON, JUnit, and HTML. Also can create custom reports.
- Has debugging tool support like Playwright Inspector, VSCode Debugger, Browser Developer Tools, and Trace Viewers Console Logs.
Cons Playwright
- Playwright is new to the IT industry, therefore has room for improvement always.
- Doesn’t support IE11 (This is mostly not considered in modern development).
- Doesn’t support native mobile apps but can be used with emulators.
- Not much of community support since it’s still growing, only Playwright official documentation is present.
Setup Playwright
Get started with Playwright
Step 1: Download Visual Studio Code from the official site https://code.visualstudio.com/
Step 2 : Install Visual Studio Code
Step 3 : Download NodeJs from the official site https://nodejs.org/en/
Step 4 : Install NodeJs
Step 5 : Check if NodeJs is installed properly by going to terminal and typing below command.
Node -v
Should node version if NodeJs is installed properly.

Now let’s install Playwright
Step 1: Go to your project workspace location from files. In my case my workspace is on “/home/tharushi/workspace”.
i. Go to “/home/tharushi/workspace”
ii. Open terminal from that directory
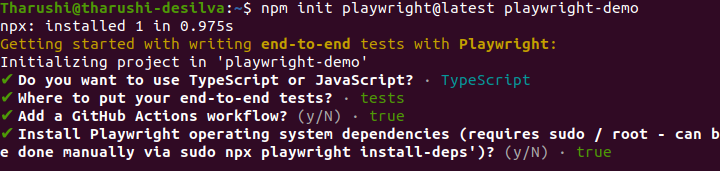
Step 2: Now let’s create a Playwright base project in our workspace directory using the command ‘npm init playwright@latest ’
npm init playwright@latest playwright-demo
iv. Once we hit the command, we are asked to answer few questions as follows;
Q1 : Do you want to use Typescript or Javascript?
A : Let’s select Typescript for the demo here.
Q2 : Where to put your end to end tests?
A : Let’s click ‘Enter’ to submit auto filled ‘tests’ folder.
Q3 : Add a GitHub actions workflow
A : Let’s click ‘Y’ to say yes and wait until everything sets up.
You should be seeing a result like this in terminal.
After the project is created, you will see the finished look as follows;
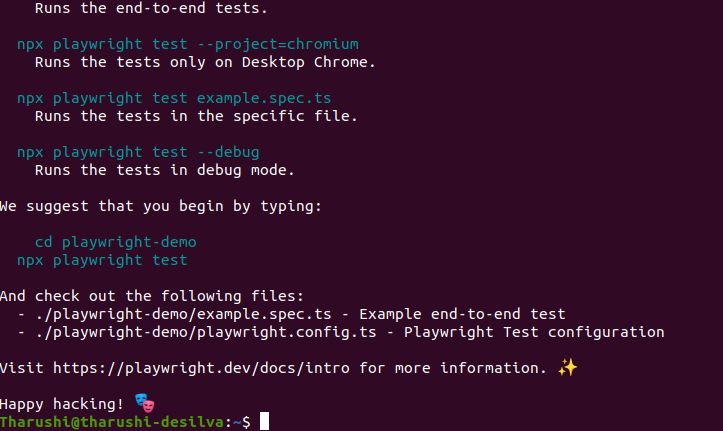
Step 3: Now navigate to the created project directory from cmd.
cd playwright-demo
Step 4: Now open VS Code from that directory
code .
Now VS Code will be opened.
Step 5: On the left side bar click on ‘Extensions’ icon
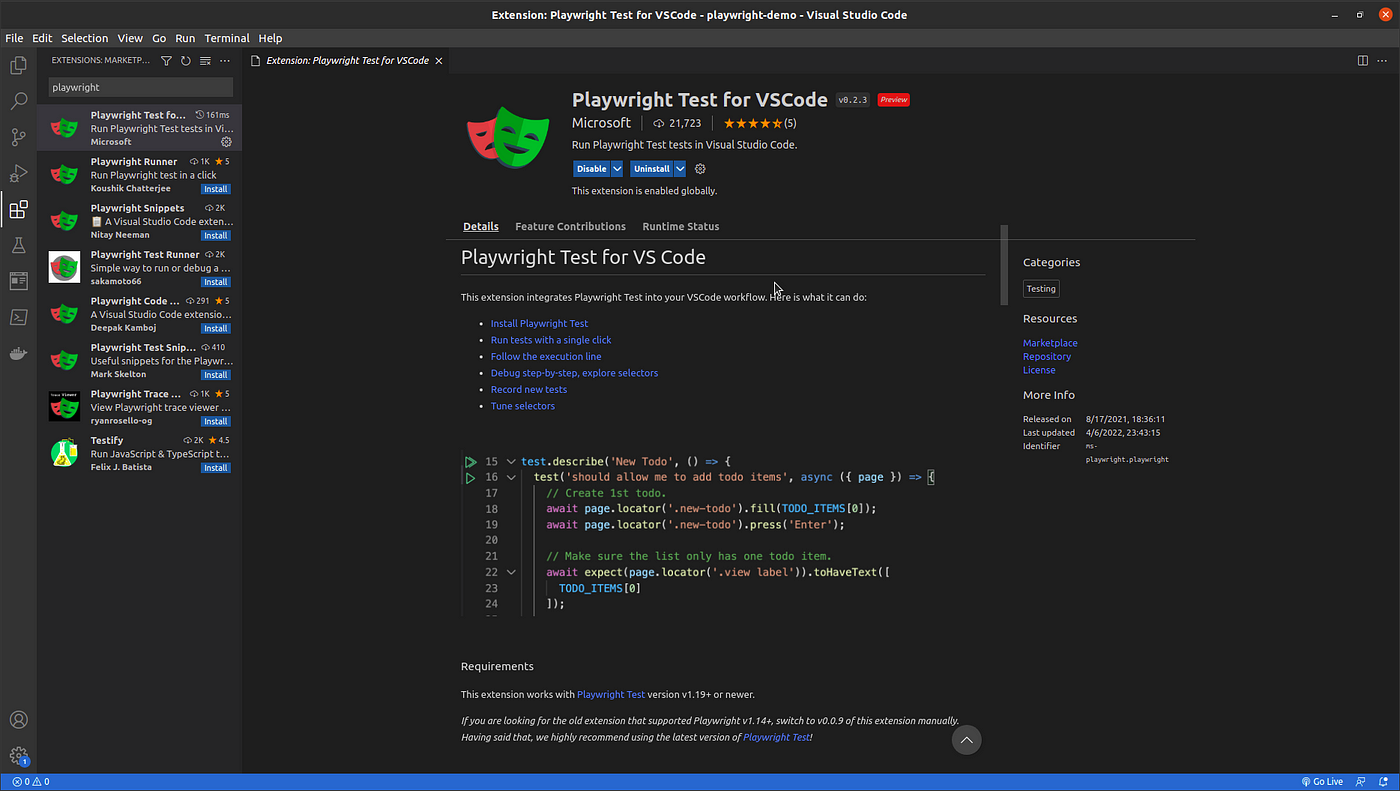
Step 6: Enter ‘Install playwright’ on the marketplace search bar.
Step 7: Select the Playwright installation result which has the Microsoft verified icon.
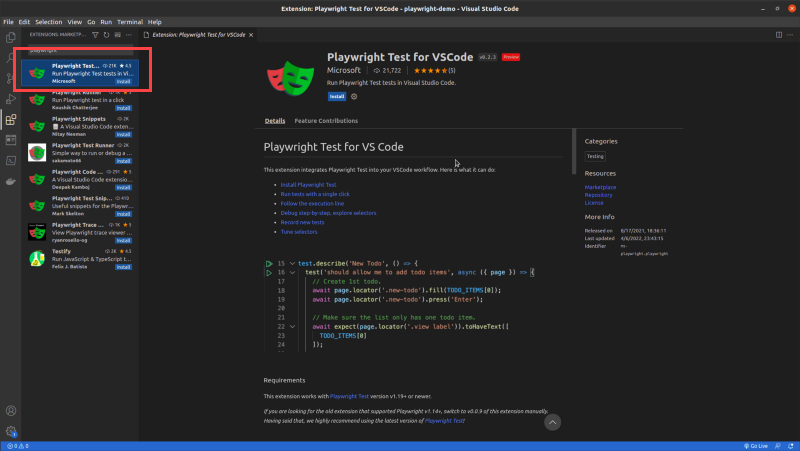
Step 8: Click ‘Install’ button, once installed you will see a preview like below.
Step 9 : Click on ‘file’ icon from left side bar and you should see the base project structure as follows;
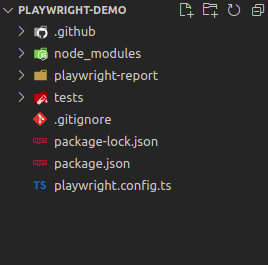
Keen to know what our base project auto generated files do?
.github file
- This file has GitHub workflow related CI/CD configurations and operating system dependencies on GitHub Actions.
playwright-report
- After each test run, the result is saved to this folder as a HTML report.
tests
- We write all the test scripts inside this tests folder.
playwright.config.ts
- Config file consists of configurations that are needed for us to enjoy features that Playwright has to offer.
Let’s see which configurations are in it;
i. Maximum time one test can run for
ii. Maximum time expected to wait until a condition is met.
iii. Should test files run in parallel.
iv. Which reporter to use (html, json, xml etc.).
v. If trace should be collected during failed tests.
vi. Browser configurations for the project.
vii. Which folder contains images, videos, traces etc.
I have done few customizations to the config file as below. (Read comments to identify added customizations).
import type { PlaywrightTestConfig } from "@playwright/test";
import { devices } from "@playwright/test";

/**
 * Read environment variables from file.
 * https://github.com/motdotla/dotenv
 */
// require('dotenv').config();

/**
 * See https://playwright.dev/docs/test-configuration.
 */
const config: PlaywrightTestConfig = {
  testDir: "./tests",
  /* Maximum time one test can run for. */
  timeout: 30 * 1000,
  expect: {
    /**
     * Maximum time expect() should wait for the condition to be met.
     * For example in `await expect(locator).toHaveText();`
     */
    timeout: 5000,
  },
  /* Run tests in files in parallel */
  fullyParallel: true,
  /* Fail the build on CI if you accidentally left test.only in the source code. */
  forbidOnly: !!process.env.CI,
  /* Retry on CI only */
  retries: process.env.CI ? 2 : 0,
  /* Opt out of parallel tests on CI. */
  workers: process.env.CI ? 1 : undefined,
  /* Reporter to use. See https://playwright.dev/docs/test-reporters */
  reporter: "html",
  /* Shared settings for all the projects below. See https://playwright.dev/docs/api/class-testoptions. */
  use: {
    /* Maximum time each action such as `click()` can take. Defaults to 0 (no limit). */
    actionTimeout: 0,
    /* Base URL to use in actions like `await page.goto('/')`. */
    // baseURL: 'http://localhost:3000',

    /* Collect trace when retrying the failed test. See https://playwright.dev/docs/trace-viewer */
    trace: "on",
  },

  /* Configure projects for major browsers */
  projects: [
    {
      name: "chromium",
      use: {
        ...devices["Desktop Chrome"],
      },
    },

    // {
    //   name: 'firefox',
    //   use: {
    //     ...devices['Desktop Firefox'],
    //   },
    // },

    // {
    //   name: 'webkit',
    //   use: {
    //     ...devices['Desktop Safari'],
    //   },
    // },

    /* Test against mobile viewports. */
    // {
    //   name: 'Mobile Chrome',
    //   use: {
    //     ...devices['Pixel 5'],
    //   },
    // },
    // {
    //   name: 'Mobile Safari',
    //   use: {
    //     ...devices['iPhone 12'],
    //   },
    // },

    /* Test against branded browsers. */
    // {
    //   name: 'Microsoft Edge',
    //   use: {
    //     channel: 'msedge',
    //   },
    // },
    // {
    //   name: 'Google Chrome',
    //   use: {
    //     channel: 'chrome',
    //   },
    // },
  ],

  // This will ignore running all test files inside the tests/example directory.
  testIgnore: "**/examples/**",
  /* Folder for test artifacts such as screenshots, videos, traces, etc. */
  // outputDir: 'test-results/',

  /* Run your local dev server before starting the tests */
  // webServer: {
  //   command: 'npm run start',
  //   port: 3000,
  // },
};

export default config;


Create a free account
Your point of view caught my eye and was very interesting. Thanks. I have a question for you.
sign up binance
Your article helped me a lot, is there any more related content? Thanks!
binance-ны алдым-ау бонусы
Can you be more specific about the content of your article? After reading it, I still have some doubts. Hope you can help me.
Registro
Thank you for your sharing. I am worried that I lack creative ideas. It is your article that makes me full of hope. Thank you. But, I have a question, can you help me?
binance-ны алдым-ау бонусы
Thank you for your sharing. I am worried that I lack creative ideas. It is your article that makes me full of hope. Thank you. But, I have a question, can you help me?
gratis binance-konto
Your point of view caught my eye and was very interesting. Thanks. I have a question for you.
binance
Thank you for your sharing. I am worried that I lack creative ideas. It is your article that makes me full of hope. Thank you. But, I have a question, can you help me?